If your photos are ripped, do not use sticky tape to put them together.
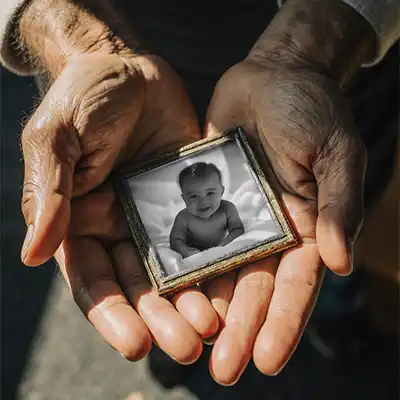
If your family photos have been faded by sunlight, creased by time, or—like in my childhood case—torn apart by curious little hands (sorry, Mum and Dad!), now is the moment to begin their rescue. These images aren’t just keepsakes; they’re fragments of legacy. Don’t wait until they’re beyond repair. Start gathering them, one by one, and give them the care they deserve.
Restoration begins with reverence. Before scanning, gently clean each photo to prevent further damage. Use a soft brush—like a clean makeup brush—or a hand-squeezed air blower to remove surface dust. Even if you’re not scanning right away, this step is essential: dust and grit can scratch the emulsion, leaving permanent scars. Handle each image as you would a relic—because in many ways, that’s exactly what it is.
The Basics of Photo Restoration
Rebuilding Memories
📦 Storing Photos with Care
Once your photographs have been gently cleaned and thoroughly dried, they deserve to be stored with the same tenderness you’d offer a cherished relic.
Best Practices for Physical Storage:
Lay photos flat, ensuring they do not touch one another directly.
Use acid-free sleeves or interleave with archival paper to prevent abrasion.
Avoid stacking photos face-down—pressure and friction can cause emulsion transfer or surface damage.
If storing outside of albums, divide photos evenly between sheets to prevent curling or warping.
Album Caution: If a photo is stuck in an old adhesive album, resist the urge to peel it out. Pulling can tear the emulsion or leave behind residue. Instead, scan it in place or consult a specialist for safe removal.
Spiritual Reflection: To store a photo well is to shelter a memory. It’s an act of quiet stewardship—preserving the stories entrusted to us..
🧵 Repairing Rips: What Not to Do
If a photo is torn, avoid the temptation to use sticky tape. While it may seem like a quick fix, tape introduces acids and adhesives that degrade the image over time, often leaving yellow stains and irreversible damage.
Instead:
Digitally restore the image using tools like Adobe Photoshop or Affinity Photo.
Reconstruct missing sections with care, using reference photos if available.
If unsure, entrust the photo to a restoration specialist who can repair it without harming its integrity.
Spiritual Reflection: Restoration is not about hiding damage—it’s about healing it. Every tear tells a story, and every repair is a gesture of grace.

If your photos are a standard size or even bigger than 600 dpi is perfect. But if you are going to be using a camera to photograph your photo I would prefer a full-frame and hi-res camera like the Sony a7R2 which is 42 megapixels that extra resolution will make a difference when it comes to restoring the photos.
Before we move on from scanning, You cannot overlook the importance of scanning properly. Second, to that, make sure you use better scanning software than what came with your scanner. I would suggest VueScan which has many functions to help you get the best scan possible from your scanner. I would also say spend some cash on a better scanner.

🖥️ Digitising Your Photos
Bringing your photos into the digital realm is a vital step in safeguarding them for future generations.
Home Scanning:
Use a flatbed scanner for best results.
Scan in full color—even for black-and-white photos—to capture tonal depth.
Save as TIFF for editing; JPEG for sharing.
Resolution Guidelines:
| Photo Size | Recommended DPI | Notes |
|---|---|---|
| Passport-sized or smaller | 1200+ dpi | Captures fine detail for restoration |
| Standard prints (4×6–8×10) | 600 dpi | Balanced quality and file size |
| Oversized prints | 300–600 dpi | Depends on detail and condition |
Avoid scanning at ultra-high resolutions (e.g. 4800 dpi) unless absolutely necessary—large files can slow editing and overwhelm storage.
Alternative Capture:
Use a DSLR or mirrorless camera (preferably full-frame).
Lay the photo flat, shoot in diffused natural light, and avoid reflections.
Use a tripod and shoot in RAW format for maximum editing flexibility.
Important Note: Mobile phones, even with scanning apps, lack the fidelity and lens quality needed for true restoration. They’re fine for casual sharing, but not for archival preservation.
🖼️ After Scanning: Preserve and Prepare
Once you’ve scanned your photo, place the original in a safe, dry location—away from light, moisture, and handling. Even after digitisation, the physical image remains a sacred artifact. You may need to re-scan if the digital copy shows issues like blurring, cropping errors, or missed details, so keep originals accessible but protected.
🧰 Digital Restoration: Tools That Heal
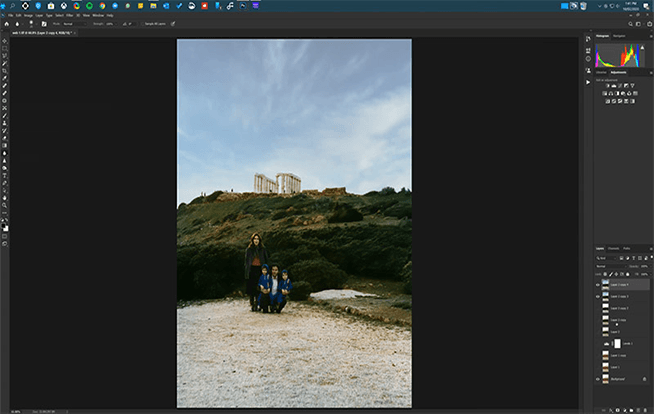
For restoration work, I rely on Adobe Photoshop—it’s a powerful tool that allows for precise, compassionate repair.
Use the Healing Brush Tool for small blemishes, dust spots, and surface scratches.
Use the Clone Stamp Tool for more complex repairs, such as reconstructing missing areas or blending torn edges.
Adjust Levels and Curves to restore contrast and tonal depth.
Work in layers to preserve flexibility and avoid destructive edits.
These tools aren’t just technical—they’re instruments of mercy, helping restore what time has worn away.
🛠️ When You Need Help
If restoration feels beyond your skill or software, don’t worry. You’re not alone in this work.
Search online using terms like:
“Photo restoration Melbourne”
“Photo restoration specialist”
“Photo restoration service near me”
These searches will guide you to professionals who can help bring your photos back to life.
And if you’re in Australia—we’re local and ready to serve.
Experience Photo Restoration Excellence Pay Only If You're Satisfied
Allow our experts to restore your damaged photos with precision and care - satisfaction guaranteed!
You only pay if you are completely satisfied with the results.
It's Simpler Than You Think
