
How to Scan a Photo on Windows Using Free Software
You don’t need fancy, expensive software to get good digital scans of your old photos. Your Windows computer already has the tools you need to get started preserving your memories.
What You’ll Need: The Essentials
Before we dive in, let’s gather your simple toolkit:
A Scanner: Most modern all-in-one printers come with a scanner built right in. If you have a printer, chances are you have a scanner!
Your Windows Computer: (Of course!)
Your Precious Photos: Give them a gentle wipe with a soft, lint-free cloth to remove any surface dust.
A USB Cable: To connect your scanner to your PC (if it’s not wireless).
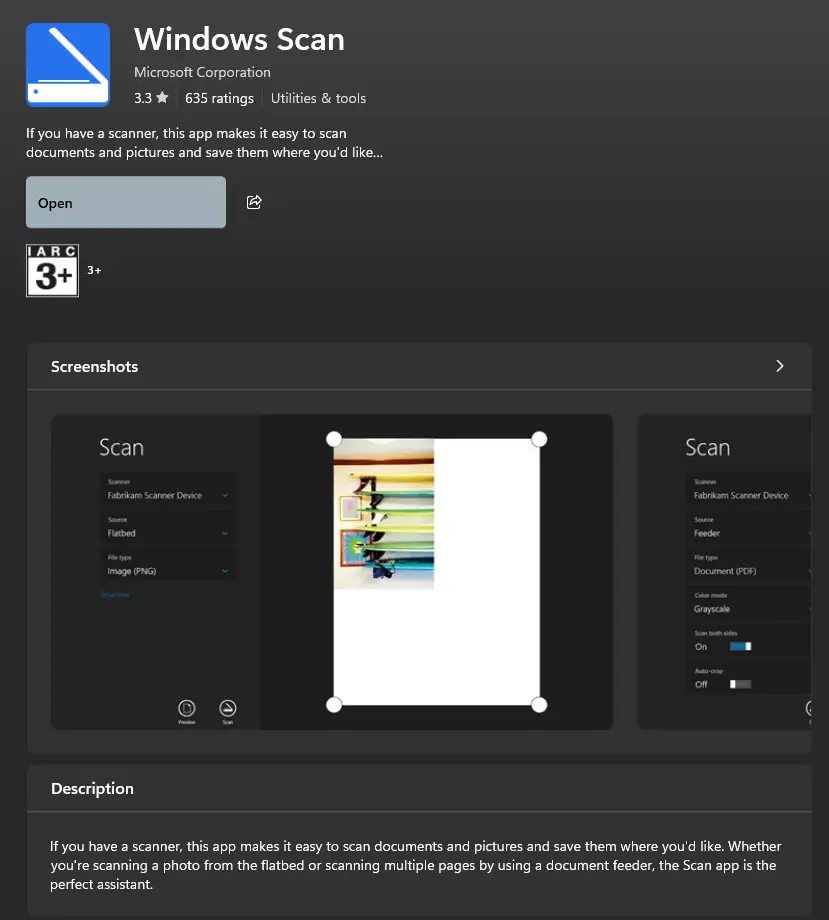
Free and Easy-to-Use Software: Windows Scan is a simple app available for free from the Microsoft Store and works well for basic photo scanning needs. If your PC does not have it already you can download it using this link. Download Link
DIY Photo Archiving:
A Beginner's Guide to Free Scanning on Windows
🪄 Step-by-Step: Using Windows Scan
1. Install the App
If you don’t already have Windows Scan:
2. Connect Your Scanner
Plug in your scanner and power it on. If it’s wireless, ensure it’s connected to the same network as your PC. Windows should detect it automatically.
Tip: If your scanner came with drivers or setup software, install those first for best results.
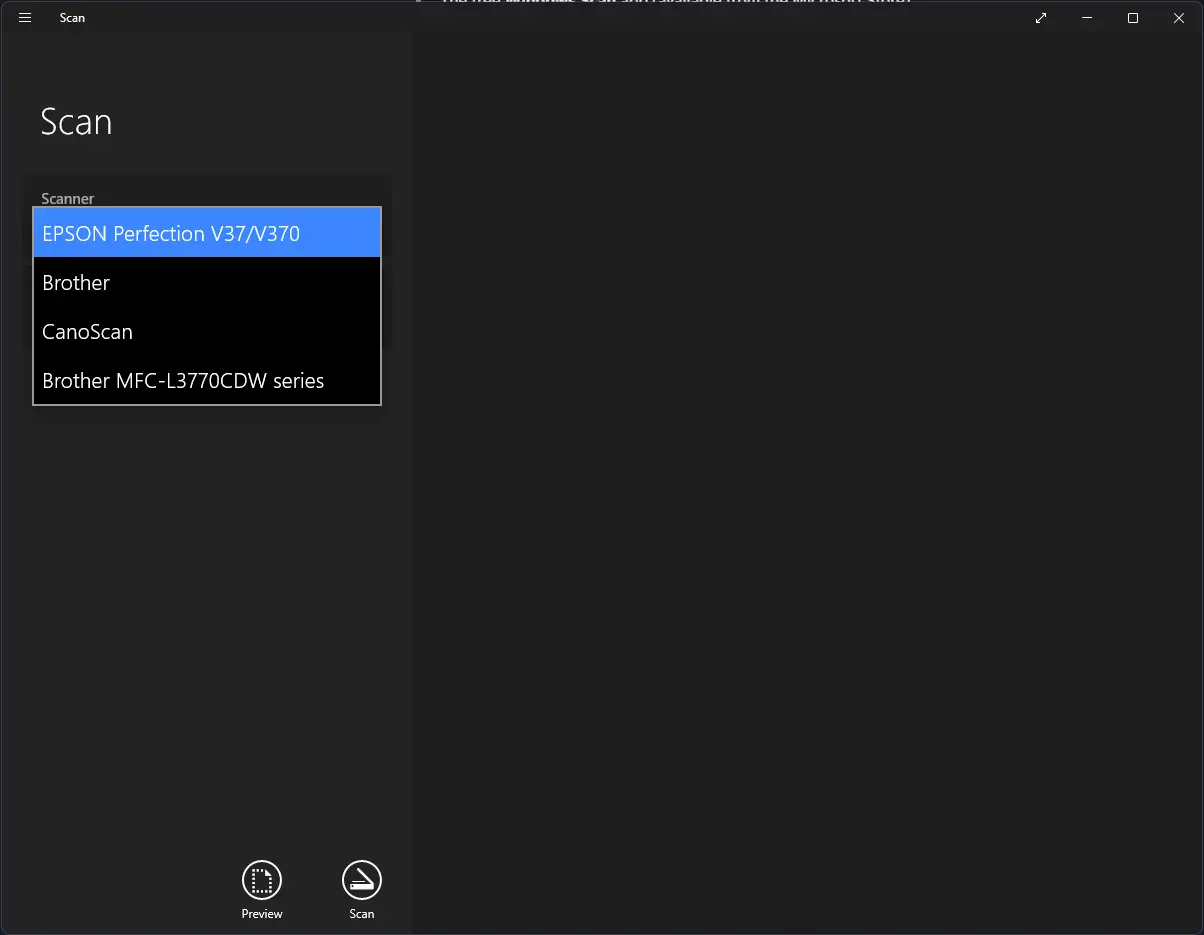
3. Open the App and Select Your Scanner
Launch Windows Scan from the Start Menu. Choose your scanner from the dropdown list.
🛠️ Adjust Your Settings
Click on Show more
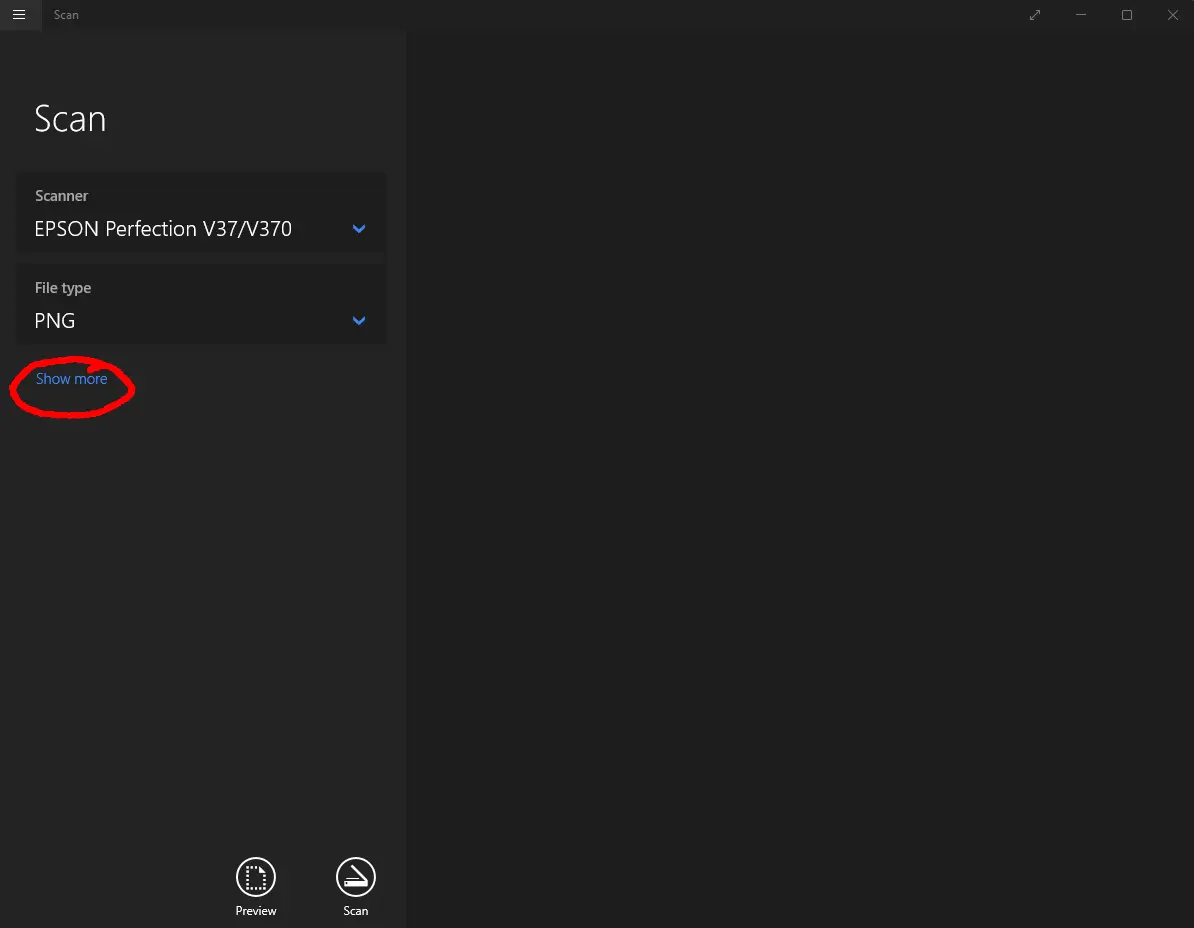
Now you will see more settings you need to adjust before scanning.
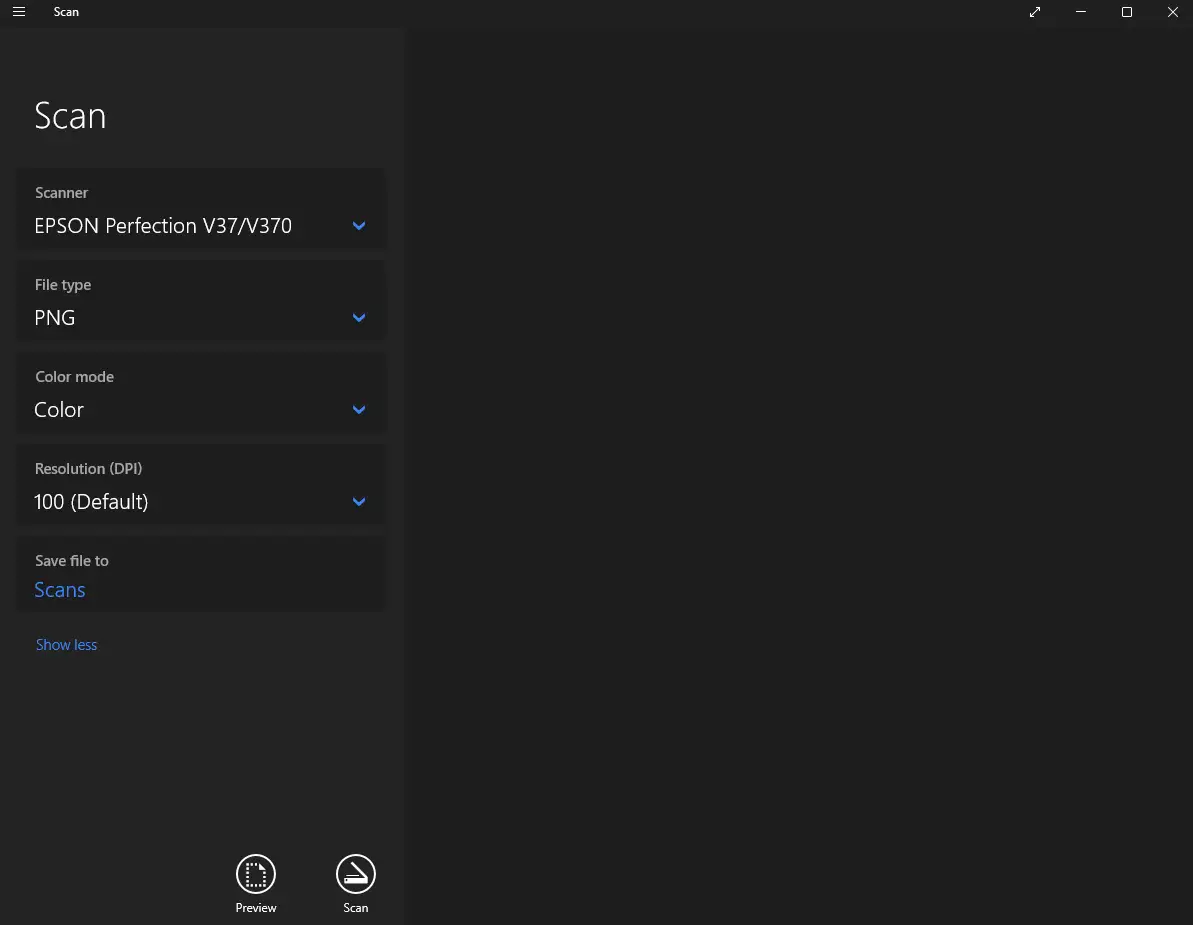
Before scanning, set:
File type: JPEG, PNG or TIFF for photos
For photos, select JPEG. This is a good balance of quality and file size for general use and sharing. If you plan extensive, professional-level restoration later and want the absolute highest quality (and don’t mind huge file sizes), you could choose PNG or TIFF, but JPEG is usually sufficient.
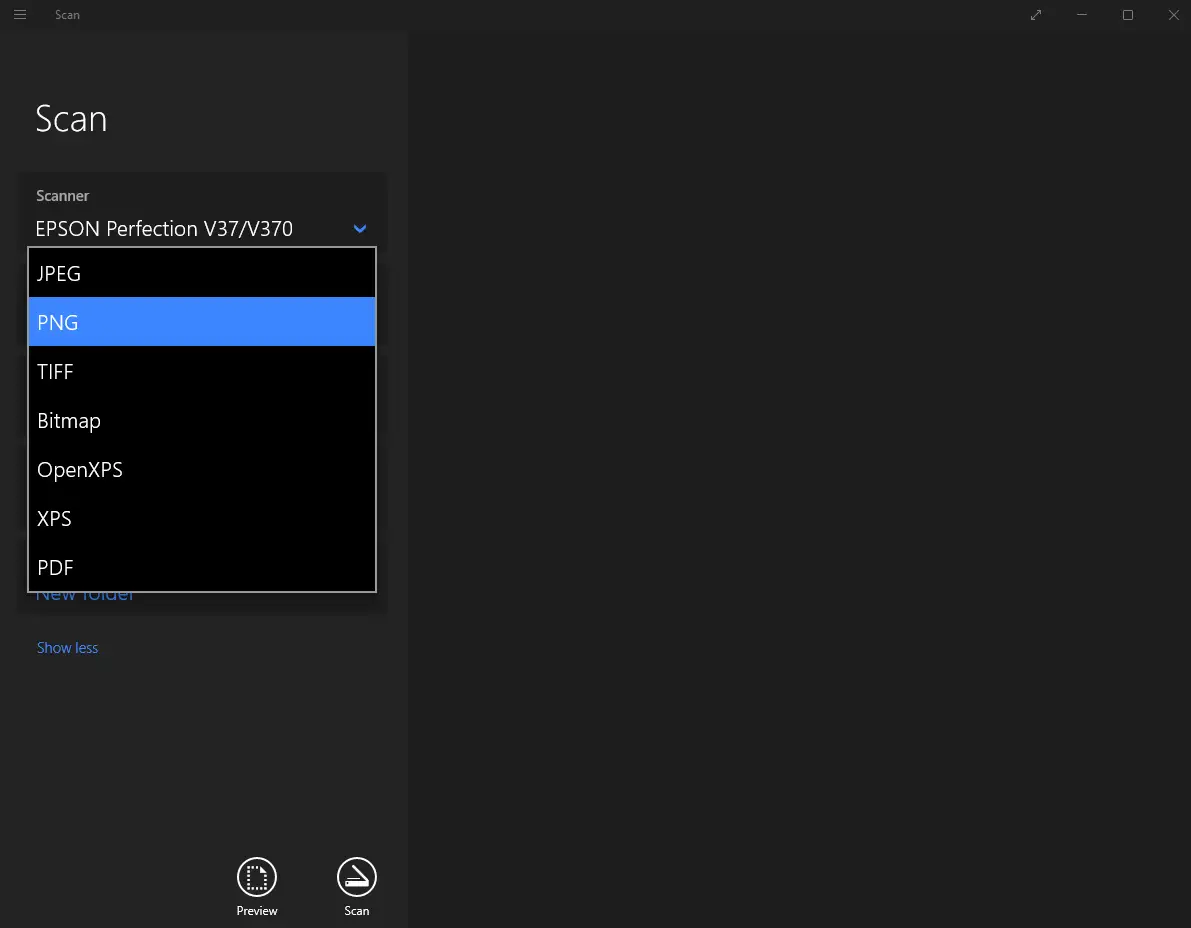
Before scanning, set:
Colour mode: Colour (unless scanning black-and-white)
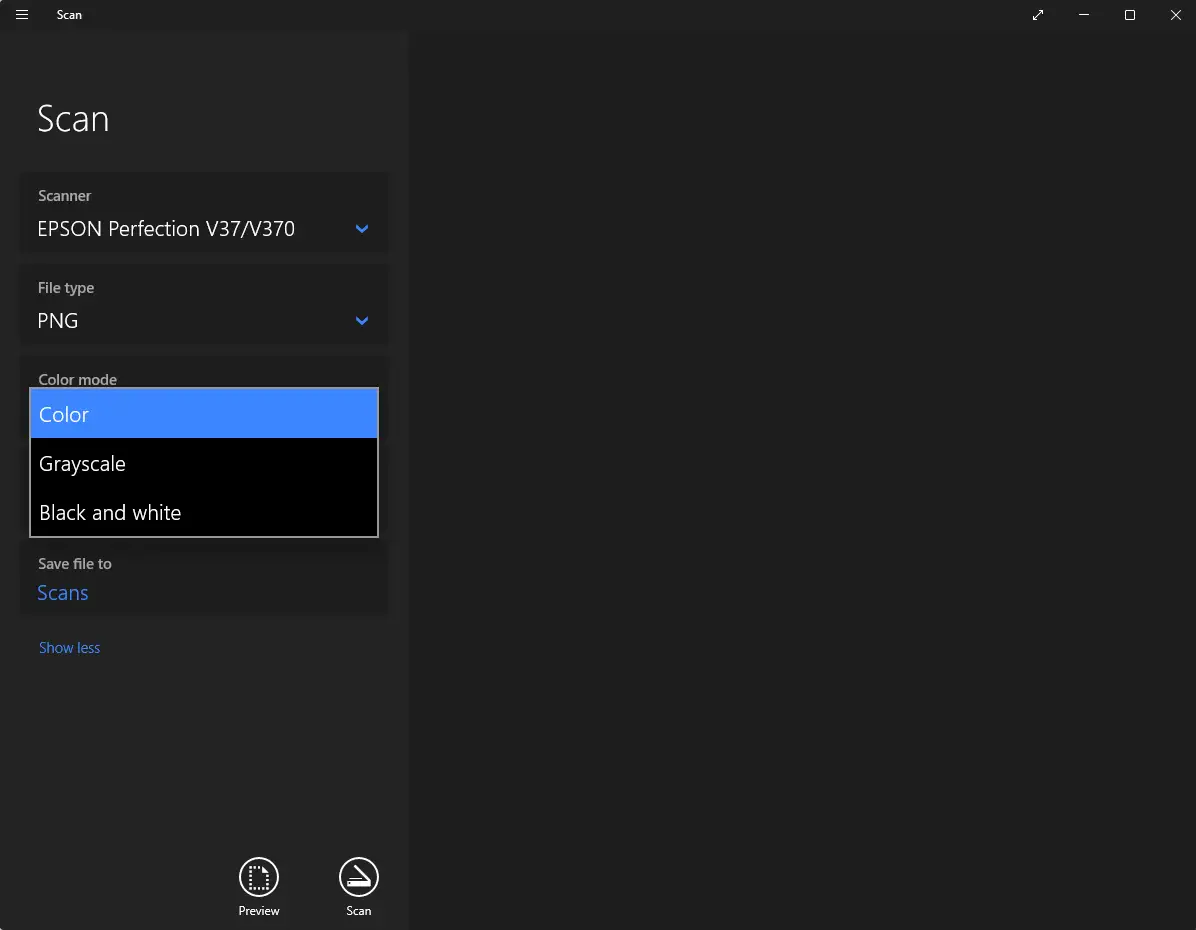
Before scanning, set:
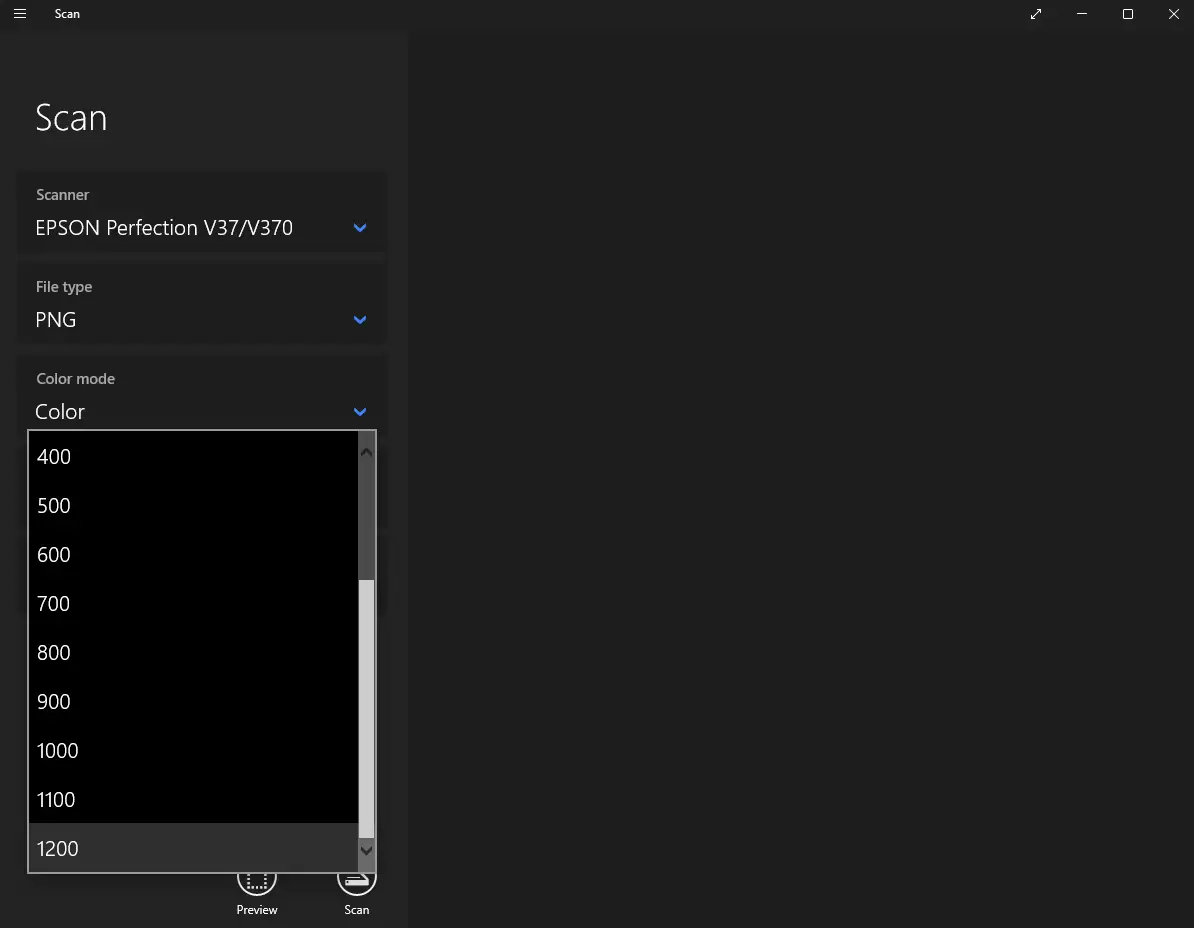
Resolution: 50–1200 DPI This is critical! DPI (dots per inch) determines the detail captured.
What DPI is best for restoration? We recommend the highest your scanner can go. High DPI captures fine detail and gives you more flexibility during enhancement. As a rule minimum 600DPI.
Be aware that higher DPI means larger file sizes and longer scan times.
Select where you would like to save your photos by clicking on Save file to
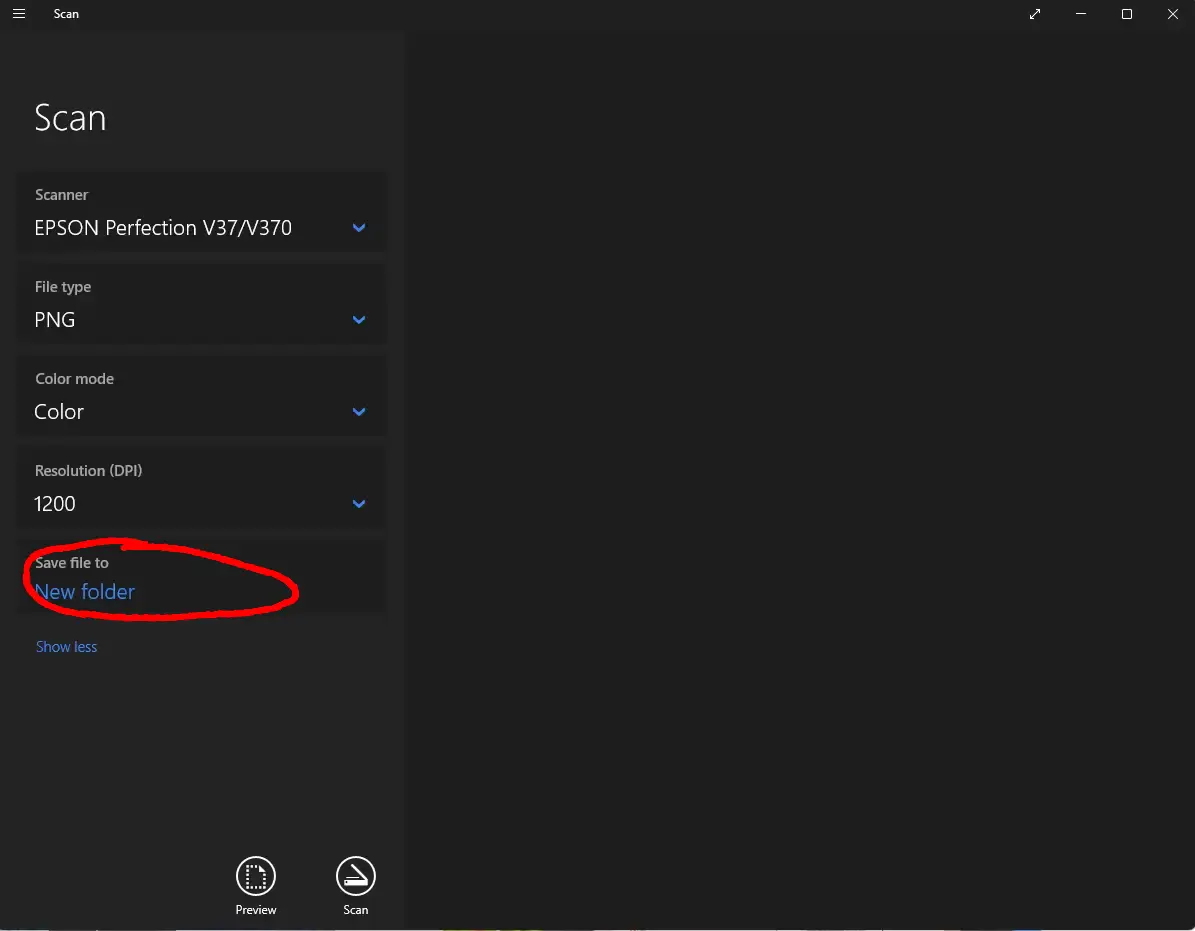
Now you are ready to click on the preview button

Preview and Position
When you preview the scan, the scanner will display the entire flatbed area—but you don’t need to scan all of it. Instead, use the large white corner handles to draw a selection box around just the photo. This ensures you capture only the image you want, without extra background or empty space.
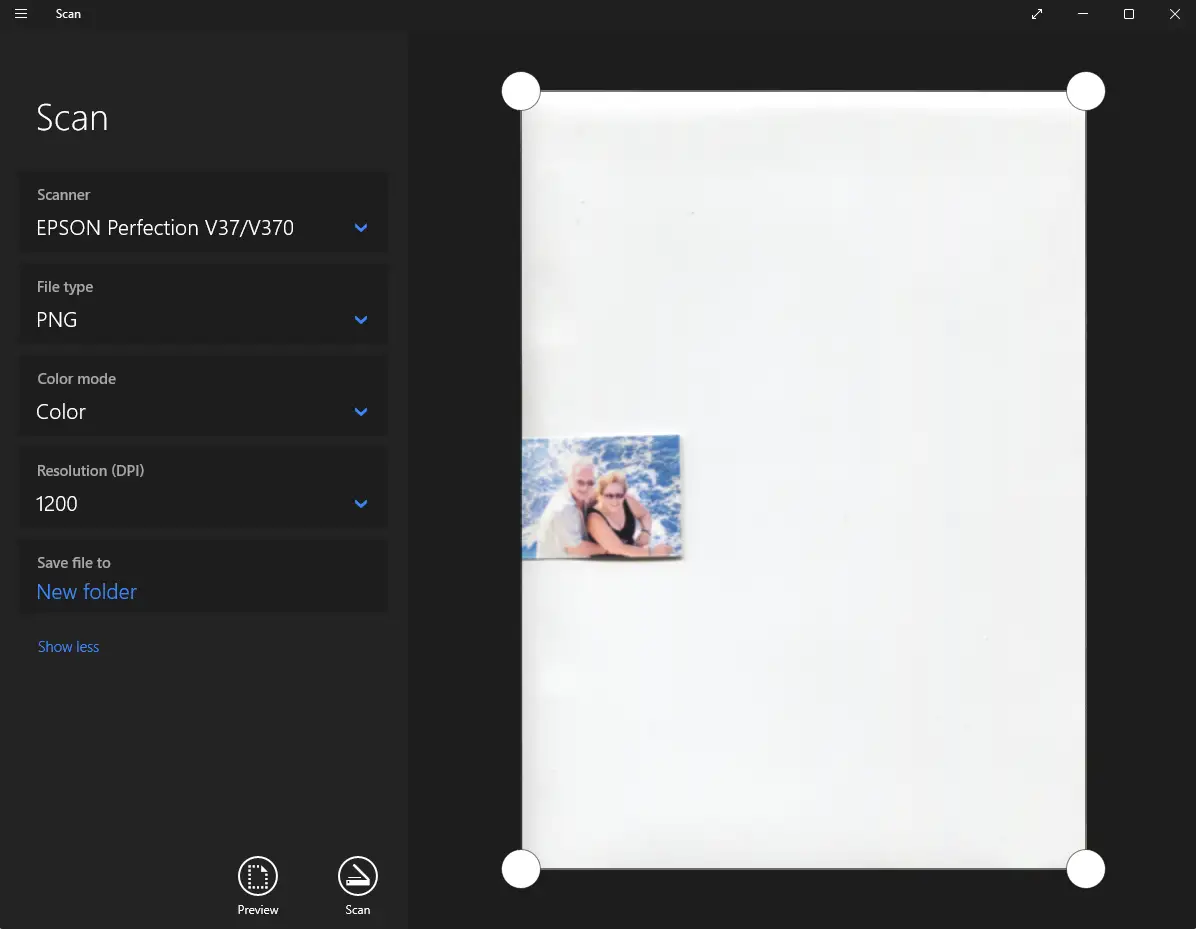
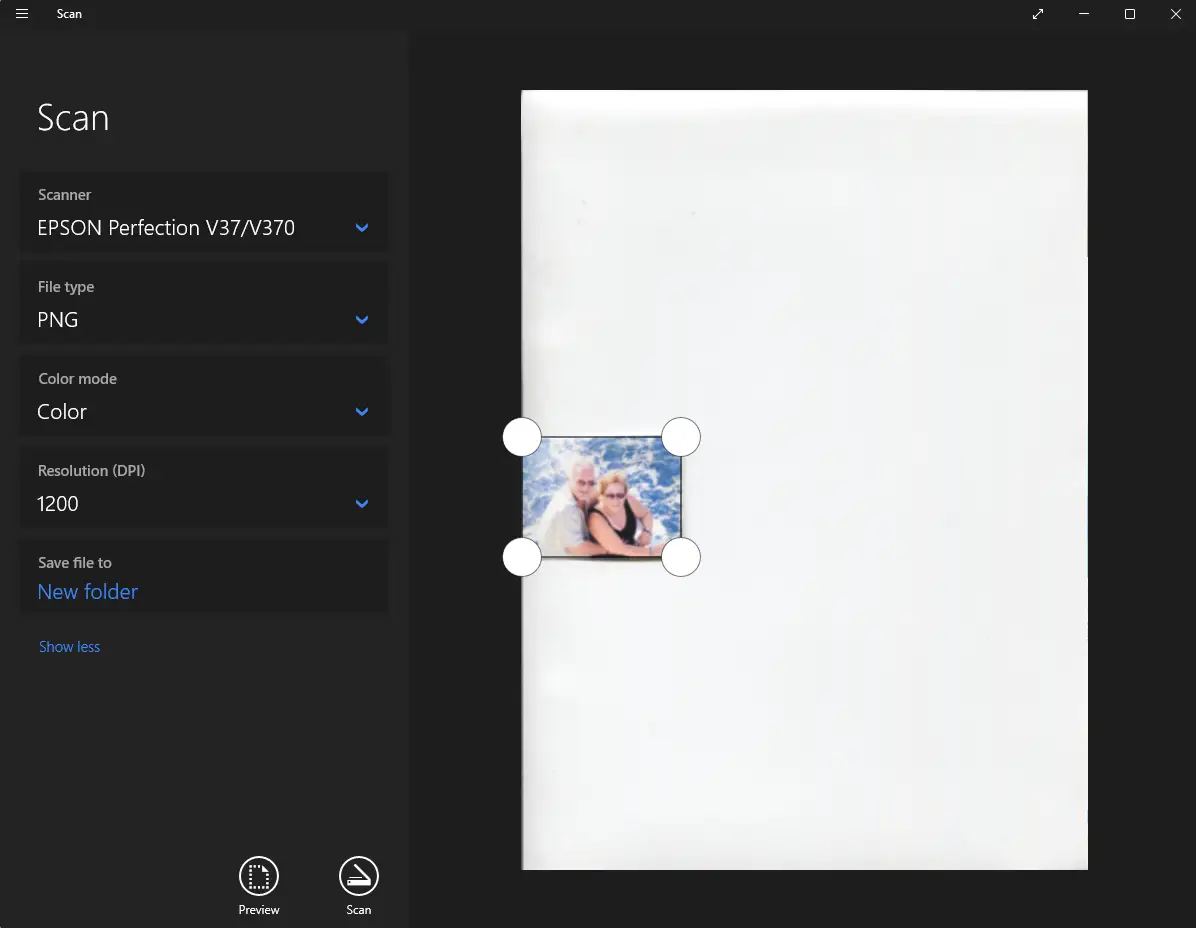
Now you are ready to click on the Scan button

The scan auto saves in the location you choose earlier.

🧼 Bonus Tips for Better Scans
Clean the scanner glass with a microfiber cloth
Avoid scanning through plastic sleeves or frames
Scan one photo at a time for best quality
What’s Next?
Once your photo is scanned, you can:
Share it with family
Back it up to cloud storage
Send it to us for professional restoration
We’ll help you bring out the best in your image—whether it’s removing creases, restoring color, or preparing it for display.
📚 Frequently Asked Questions
Can I scan multiple photos at once?
It’s possible but not recommended for top quality; one-by-one scanning reduces cropping errors and improves image clarity.
How do I safely clean old photos?
Use a soft microfiber cloth or brush and avoid liquids that could damage delicate prints.
Can my phone replace a scanner?
Mobile scanning apps can work in a pinch but typically can’t match the detail and flatbed precision of a proper scanner.
What DPI should I use?
Prioritize 600 DPI for your most cherished photos or those you might want restored professionally. For less critical images, 300 DPI is fine.
My scanner isn't detected!
Double-check all cables, ensure the scanner is on, and restart your computer. If problems persist, visit your scanner manufacturer's website for specific troubleshooting or updated drivers.
My scanned photos look dull or faded.
That's perfectly normal for old photos! The scanner captures what's physically there. This is where professional photo restoration comes in to correct colours, remove fading, and revitalize the image.
Should I scan in JPEG or PNG format?
JPEG is great for everyday use and smaller file sizes. PNG preserves more detail and is better for restoration work, especially if you plan to edit or enhance the image later.
Can I scan photos that are stuck in albums or frames?
Yes, but proceed with care. If the photo is glued or tightly framed, avoid forcing it out. Instead, photograph it with good lighting or consult us—we can advise on safe removal or alternative capture methods.
What’s the best way to store scanned photos?
Save them in multiple places: your computer, an external hard drive, and cloud storage. Use folders with clear names and dates to keep your digital archive organised.
Can I scan negatives or slides too?
Yes—with the right equipment. Flatbed scanners with transparency adapters or dedicated film scanners can digitise negatives and slides beautifully. We offer this service if you’d prefer professional handling.
Why does my scan have shadows or uneven lighting?
This usually happens when scanning through plastic sleeves or if the scanner lid doesn’t close properly. Remove any obstructions and scan directly on clean glass for best results.
How do I name my scanned files?
Use clear, descriptive names like “Grandma_Birthday_1962” or “FamilyPicnic_March1985.” This makes searching easier and helps future generations understand the context.
Can I scan documents and letters too?
Absolutely. Scanning handwritten notes, letters, and certificates is a beautiful way to preserve family history. We can also enhance faded ink or remove stains if needed.
Is it okay to scan black-and-white photos in color mode?
Yes! Scanning in color mode captures subtle tones and paper texture that may be lost in grayscale. It gives us more flexibility during restoration.
