Black and white photos have a timeless charm, but adding colour to them can bring a new dimension to historical moments, family memories, or artistic projects. Thanks to modern technology, colourising a black and white photo is easier than ever. In this blog, we’ll explore the tools and software available, and walk you through the process of colourising a photo using Adobe Photoshop. If you’re in Melbourne and need professional assistance, consider reaching out to photo restoration rescue in Melbourne to bring your cherished memories to life.
How To Colourise A Black And White Photo
Unlock the Power of Colour
Why Colourise a Black and White Photo?
Colourising a black and white photo can:
-
Bring historical images to life.
-
Add emotional depth and realism.
-
Preserve and enhance family memories.
-
Create unique artistic expressions.
Whether you’re a photographer, historian, or hobbyist, colourisation is a skill worth learning. For those in Melbourne, a professional photo restoration service like us can help you achieve stunning results with ease.
Below is the photo we will be working on

Tools and Software for Colourising Photos
There are several tools and software options available for colourising black and white photos, ranging from beginner-friendly apps to professional-grade software. Here are some popular choices:
-
Adobe Photoshop
The industry standard for photo editing, Photoshop offers advanced tools for manual colourisation. It’s ideal for those who want full control over the process. -
GIMP
A free and open-source alternative to Photoshop, GIMP provides similar features for colourisation, though it may require more manual effort. -
DeepAI Colouriser
An AI-powered tool that automatically colourises photos. It’s great for quick results but lacks the precision of manual editing. -
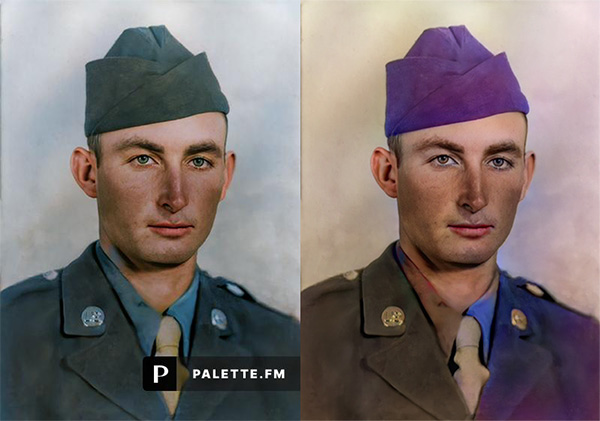
Palette.fm
Another AI-based tool that uses machine learning to add colour to black and white images. -
Codijy
A specialised colourisation software designed specifically for adding colour to black and white photos. Codijy offers intuitive tools and a user-friendly interface, making it a great choice for both beginners and professionals.
For this guide, we’ll focus on using Adobe Photoshop, as it offers the most flexibility and professional results. However, if you’re in Melbourne and prefer professional assistance, photo restoration rescue in Melbourne can handle the process for you.
The below images are colourised useing the A.I’s mentioned above. There is no input to the colours and results are less than average.

What You’ll Need
-
A high-resolution black and white photo.
-
Adobe Photoshop (or a similar photo editing software).
-
A graphics tablet (optional but recommended for precision).
-
Reference images for accurate colour choices (optional).

Step-by-Step Guide to Colourising a Photo in Photoshop
Step 1: Prepare Your Image
-
Open your black and white photo in Photoshop.
-
Duplicate the background layer (right-click the layer and select “Duplicate Layer”) to preserve the original image.
-
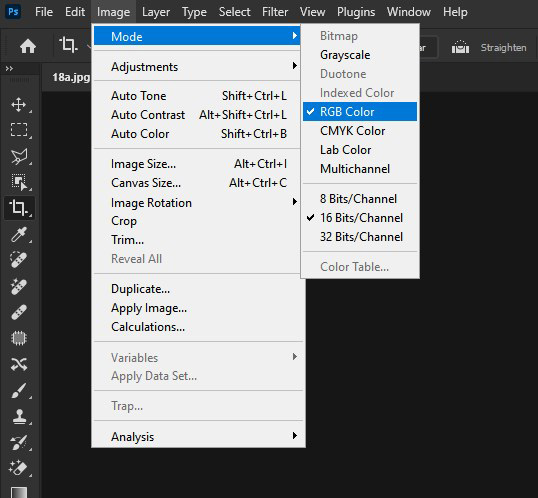
Convert the image to RGB colour mode by going to Image > Mode > RGB Colour. This allows you to add colour to the photo.

Step 2: Create a Base Layer
-
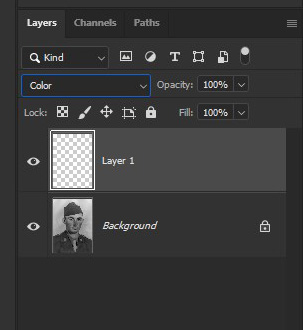
Add a new layer above the duplicated background layer.
-
Set the blending mode of this new layer to Colour. This ensures that the colours you add will blend naturally with the underlying tones.

Step 3: Start Adding Colour
-
Select the Brush Tool (B) and choose a soft brush with low opacity (around 20-30%).
-
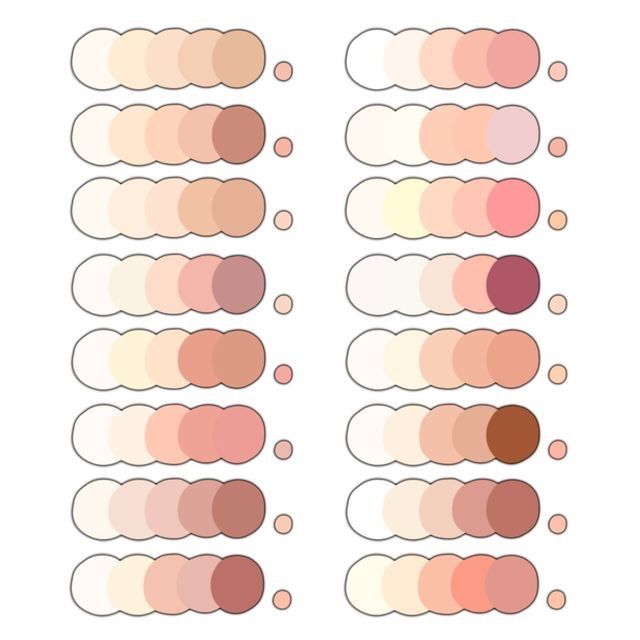
Pick a colour from the colour palette that matches the object or area you’re colouring (e.g., skin tones, clothing, etc.).
-
Begin painting over the areas you want to colourise. Use reference images if needed to ensure accuracy.
Step 4: Use Adjustment Layers for Precision
-
To refine your colours, use Adjustment Layers like Hue/Saturation or Colour Balance.
-
Create a new adjustment layer for each major colour group (e.g., skin, hair, background).
-
Clip the adjustment layer to the base colour layer by holding Alt and clicking between the layers. This ensures the adjustments only affect the layer below.

Step 5: Add Shadows and Highlights
-
Create a new layer and set its blending mode to Overlay or Soft Light.
-
Use a soft brush to paint shadows (with a darker colour) and highlights (with a lighter colour) to add depth and realism.
Step 6: Fine-Tune the Image
-
Zoom in and check for any areas where colours may have spilled over.
-
Use the Eraser Tool (E) or a layer mask to clean up edges and refine details.
-
Adjust the opacity of layers to balance the intensity of colours.
Step 7: Save Your Work
-
Once you’re satisfied with the colourisation, flatten the image by going to Layer > Flatten Image.
-
Save the final image in your desired format (JPEG, PNG, etc.).

Tips for Better Colourisation
-
Research Colours: For historical photos, research the era’s clothing, architecture, and environment to ensure accuracy.
-
Use Reference Images: Look at similar coloured photos to guide your colour choices.
-
Work in Layers: Keep each colour group on a separate layer for easy adjustments.
-
Be Patient: Colourisation is a meticulous process, so take your time to achieve the best results.
Professional Photo Restoration in Melbourne
If you’re in Melbourne and want to ensure your black and white photos are colourised with the utmost care and precision, consider using us professional photo restoration service in Melbourne. These experts have the tools, skills, and experience to restore and colourise your photos, preserving your memories for generations to come.
Colourising a black and white photo is a rewarding process that combines artistry and technical skill. While AI tools can provide quick results, using software like Photoshop or Codijy allows for greater control and creativity. With practice, you can transform monochrome images into vibrant, lifelike works of art. For those in Melbourne, photo restoration rescue can take the hassle out of the process, delivering professional-quality results. So, grab your favourite black and white photo and start adding colour to history!
Experience Photo Restoration Excellence Pay Only If You're Satisfied
Allow our experts to restore your damaged photos with precision and care - satisfaction guaranteed!
You only pay if you are completely satisfied with the results.
It's Simpler Than You Think
