If you’ve ever unearthed an old box of photos and stumbled upon a cherished picture that’s seen better days, you’re not alone. Over time, photos can fade, develop scratches, or suffer from the effects of moisture or mishandling.
In this beginner’s guide, we’ll show you how to restore old photos at home using simple tools and techniques. Whether you’re looking to fix a few scratches or bring back some lost colour, this DIY photo restoration guide will give you the basics to get started.
Restoring old photos at home can be a fun and rewarding project that allows you to preserve your precious memories for future generations. With the right tools and a little practice, even beginners can fix up faded, scratched, or damaged photos. Just remember to take your time, and don’t be afraid to seek professional assistance when necessary. With a bit of effort, your photos can be brought back to life in no time.
How to Restore Old Photos at Home:
A Beginner’s Guide
Why Restore Photos at Home?
Before diving into the “how,” let’s quickly explore why you’d want to restore old photos. For one, it’s a way to preserve memories that may otherwise deteriorate. Plus, with a little time, patience, and the right tools, you can bring those photos back to life. Not only that, but it’s an incredibly rewarding process to see an old, damaged photo transformed into something vibrant and beautiful again.
However, if your photos are severely damaged or the project becomes too complex, there are times when calling a professional might be the best choice. We’ll touch on that toward the end of this guide.
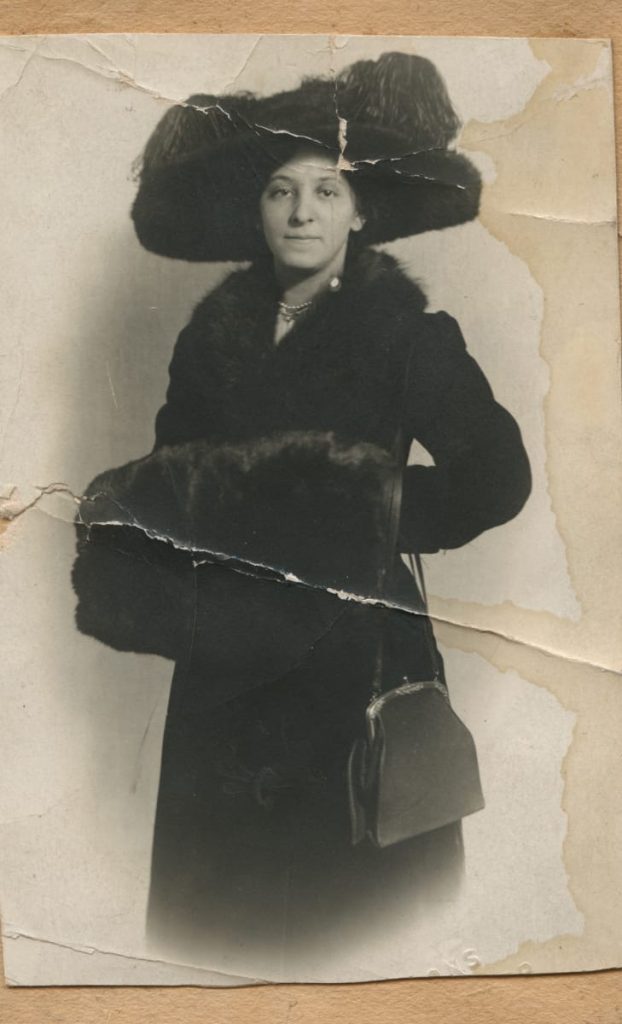
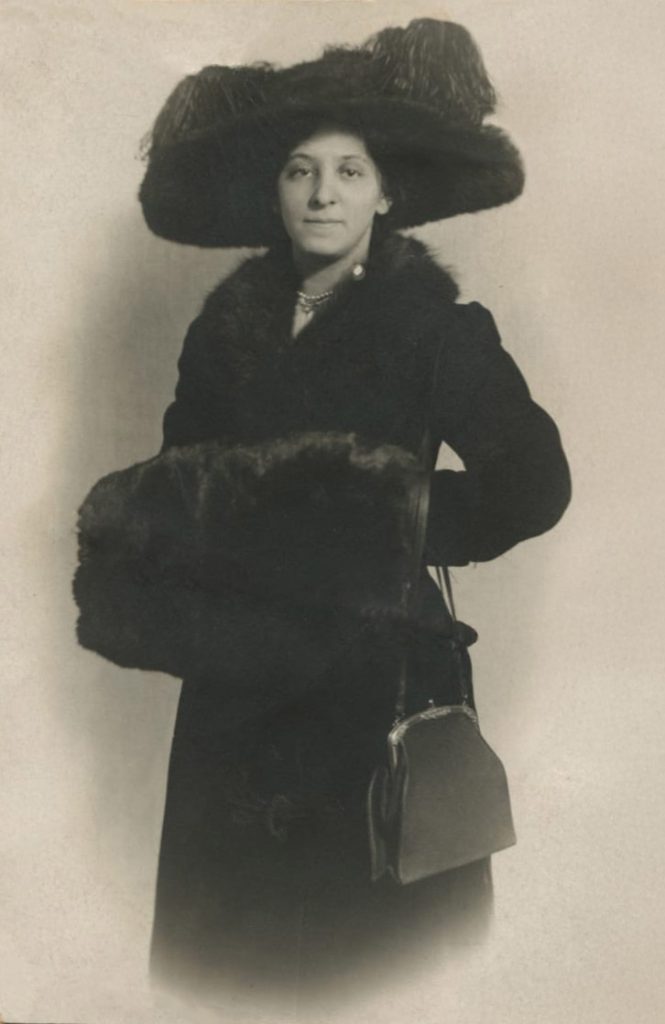
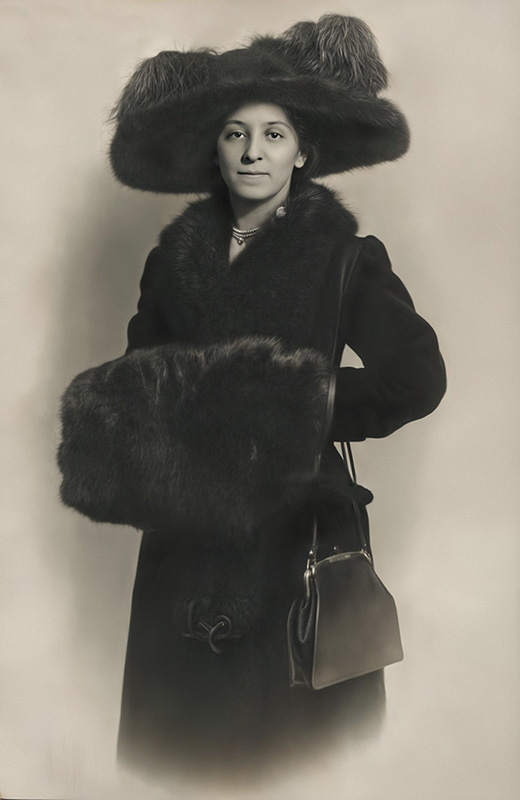
For the purposes of this demonstration, we will be using the following image using Photopea.
Before diving into the “how,” let’s quickly explore why you’d want to restore old photos. For one, it’s a way to preserve memories that may otherwise deteriorate. Plus, with a little time, patience, and the right tools, you can bring those photos back to life. Not only that, but it’s an incredibly rewarding process to see an old, damaged photo transformed into something vibrant and beautiful again.
However, if your photos are severely damaged or the project becomes too complex, there are times when calling a professional might be the best choice. We’ll touch on that toward the end of this guide.
To try the steps yourself, download the example image using the button below.

Basic Tools and Software for Photo Restoration
To get started with DIY photo restoration, you don’t need a ton of fancy equipment. But there are a few essential tools and software that will make your job a lot easier. Here’s what you’ll need:
1. Scanner
First things first: in order to restore your photo, you’ll need a digital version of it. If you don’t already have a digital copy, you can scan your photo using a flatbed scanner. To learn how to scan a photo click here.
2. Photo Editing Software
Once you have a digital version of your photo, you’ll need software to make the edits. Popular choices include:
- Adobe Photoshop – The industry standard for photo editing.
- GIMP – A free, open-source alternative to Photoshop with many similar features.
For beginners, there are simpler, free alternatives like Fotor or Pixlr that still offer powerful tools.
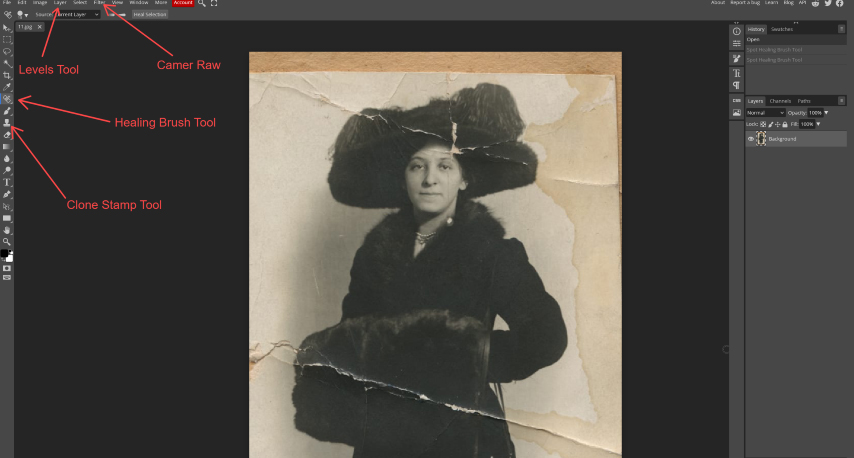
For this guide, I’ll be using the free, web-based version of Photopea, so there’s no need to install any software.

3. Basic Editing Tools
You don’t need to be a Photoshop pro to fix most minor issues. Here are some of the basic tools that will come in handy:
- Clone Stamp/Healing Brush – To remove dust, scratches, and other imperfections.
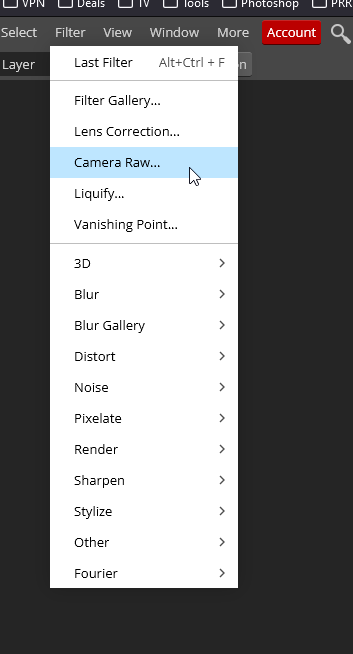
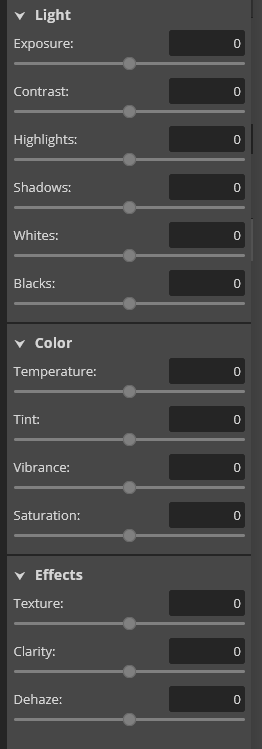
- Camera Raw – Brightness and Contrast Adjustments – To make your image pop and adjust faded colours.
- Sharpen Tool – To bring more detail to blurry photos.
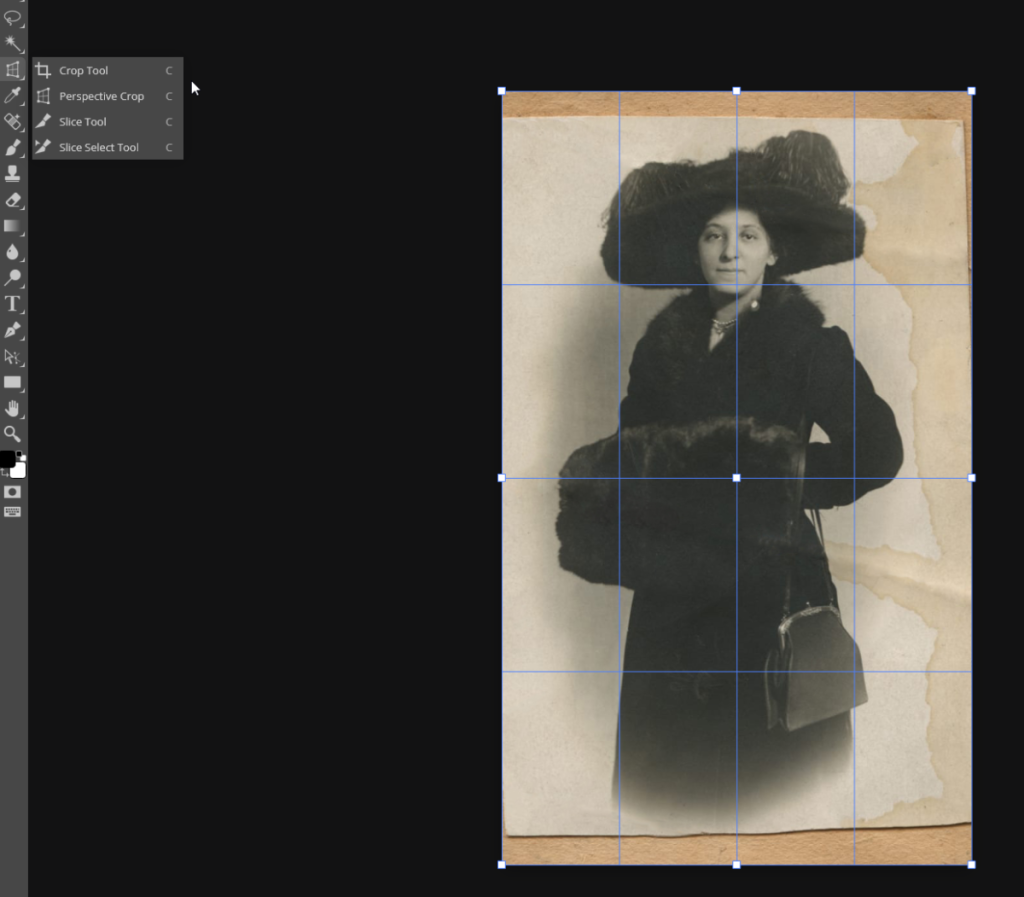
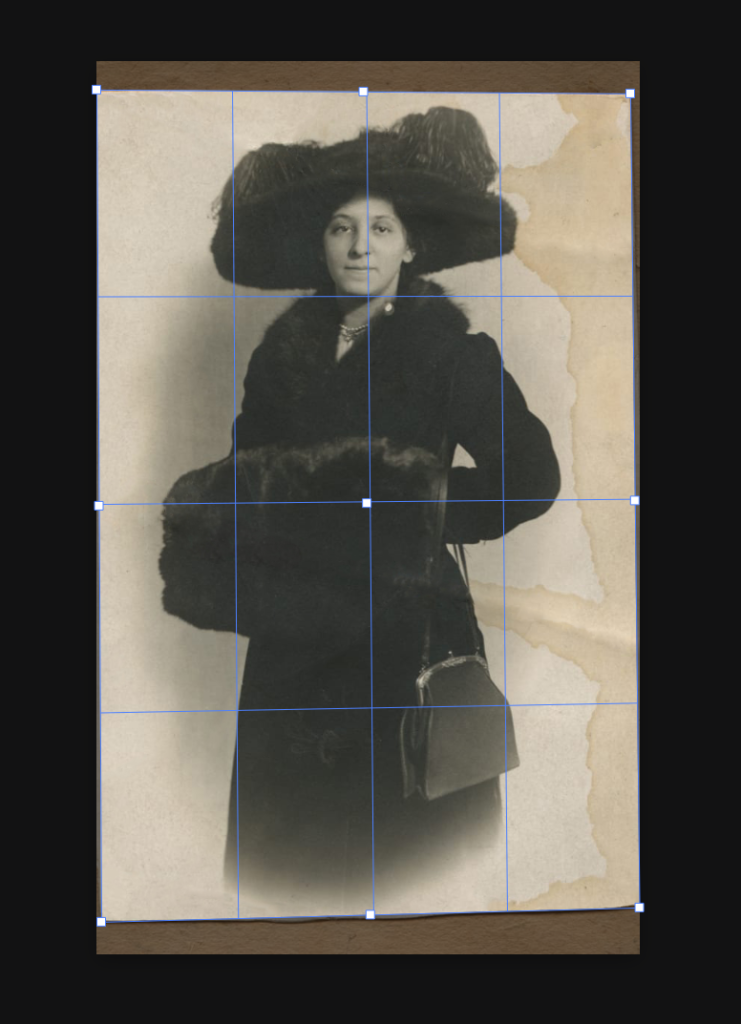
- Crop Perspective – For fixing the skewed perspective of the photo.
Step-by-Step Guide for Simple Fixes
Now that you have your tools ready, it’s time to dive into the actual restoration. Here are some of the basic fixes you can tackle yourself:
1. Remove Scratches, Dust, and Blemishes and rips
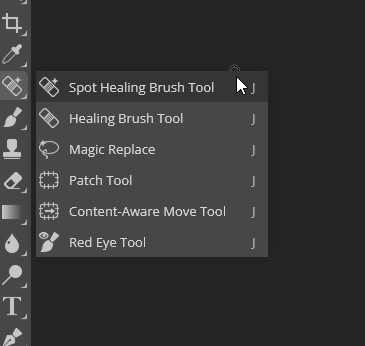
One of the most common issues with old photos is the appearance of scratches, dust, or smudges. You can remove these imperfections using the Clone Stamp or Healing Brush tools in most photo editing software. Simply zoom in on the damaged areas, and use the tool to paint over the imperfections with surrounding pixels. This process takes patience, but the results are often worth it.
After selecting your tool brush over the damaged areas.

2. Adjust Exposure and Contrast
Older photos, especially those taken on film, can appear faded over time. To revive their vibrancy, adjust the brightness and contrast settings in your software. Increasing the contrast will make coloors pop, while adjusting the brightness can help lighten dark or overexposed areas. Be mindful of the image’s overall feel—too much contrast can make an image look unnatural.
3. Crop And Fix Perspective
Since this image is a photo of another photo, we need to adjust the perspective using the perspective crop tool available in Photopea.

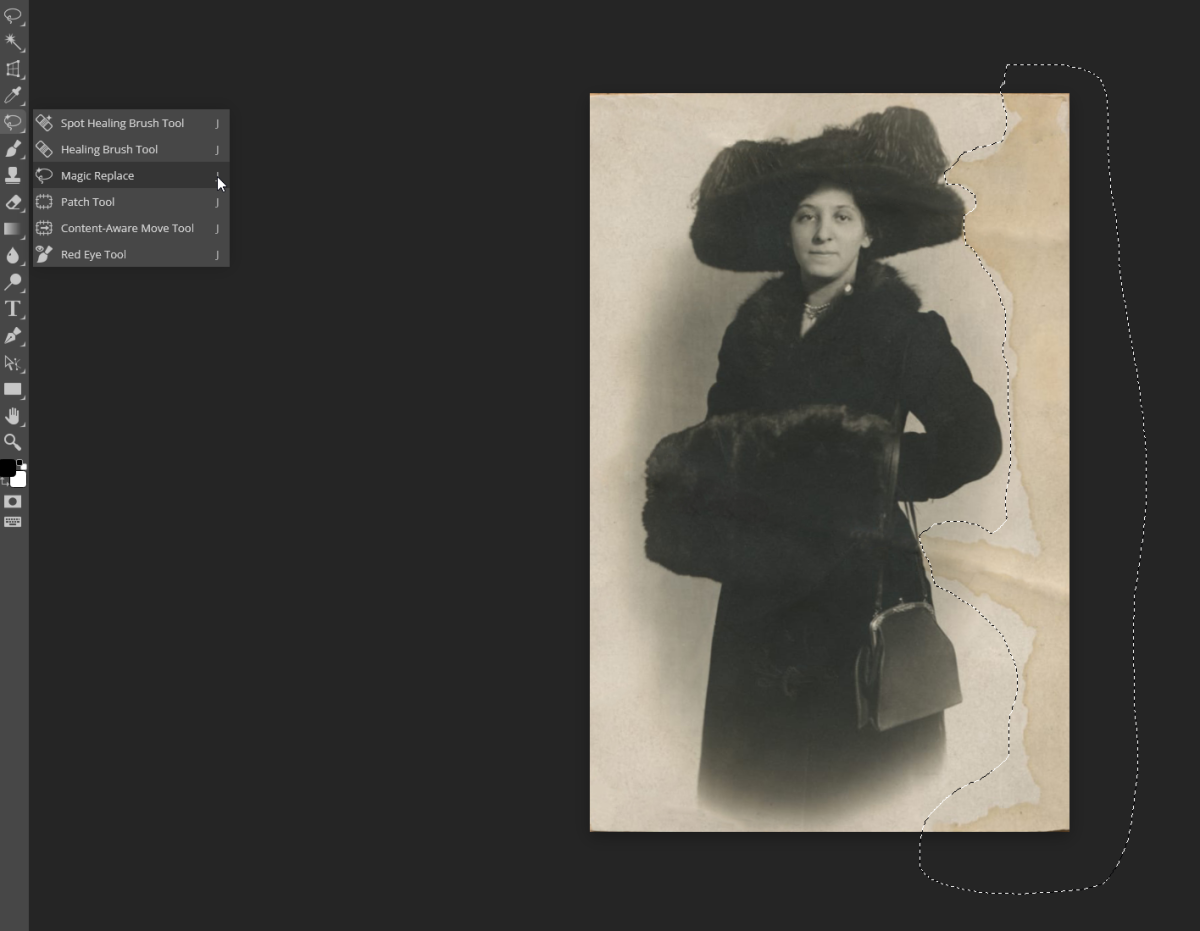
4. Remove Stain
For more significant damage, like torn or missing parts of the photo, the Clone Stamp tool can help you recreate the missing sections. Be patient and zoom in on the damaged areas for more precision. You can also use a combination of layering and masking to blend the new parts seamlessly with the old photo.
4. Noise Removal
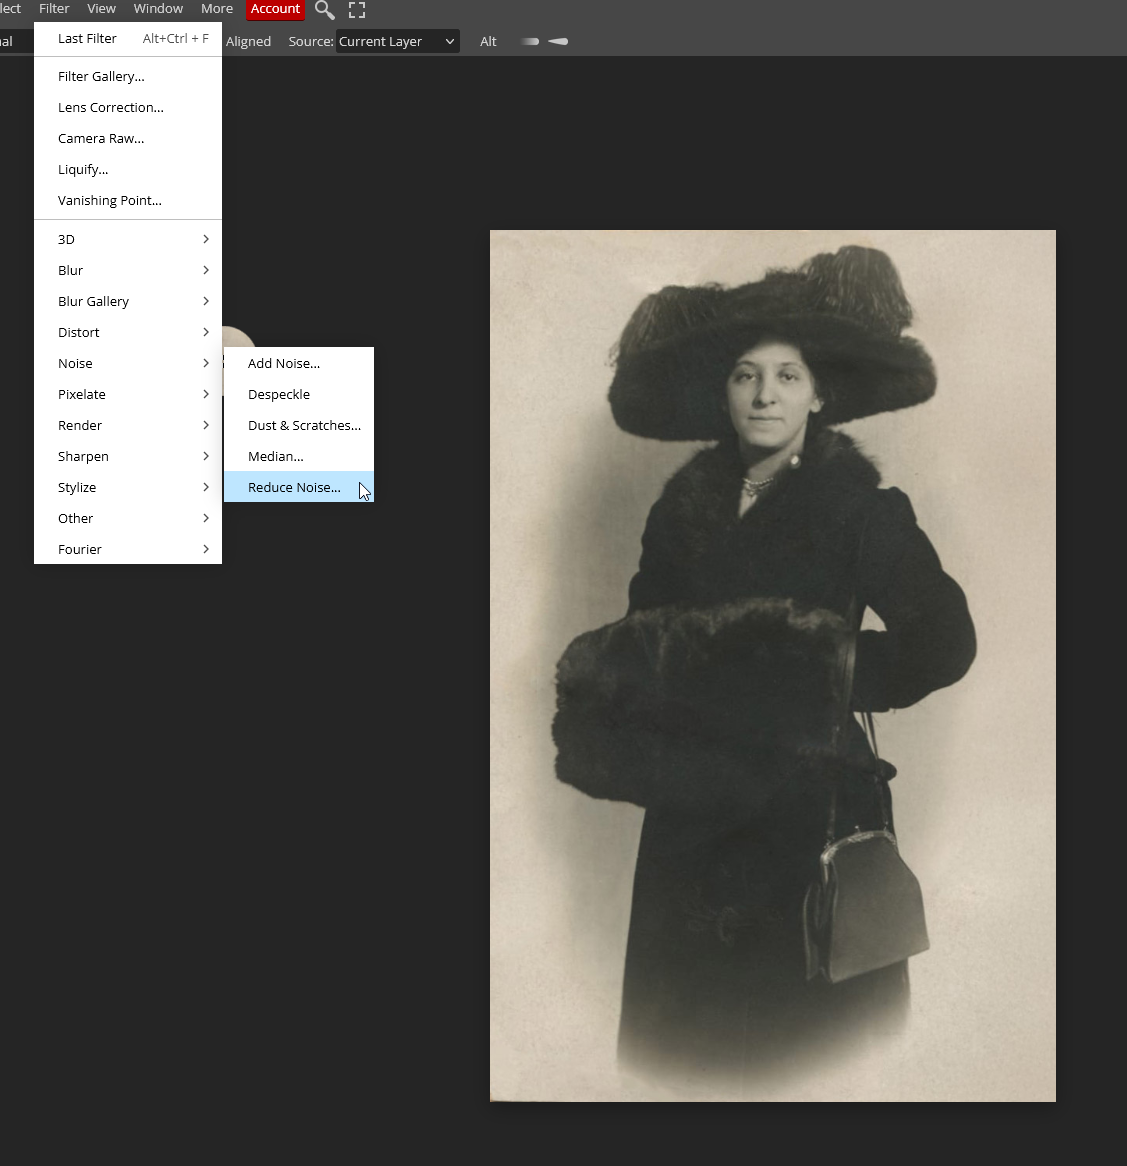
The image contains noise, pixelation, and JPEG artifacts. To address this, we’ll use the noise reduction filter to minimize these imperfections. Experiment with the settings until you achieve a result that looks clean and visually appealing to you.
4. Sharpen Image
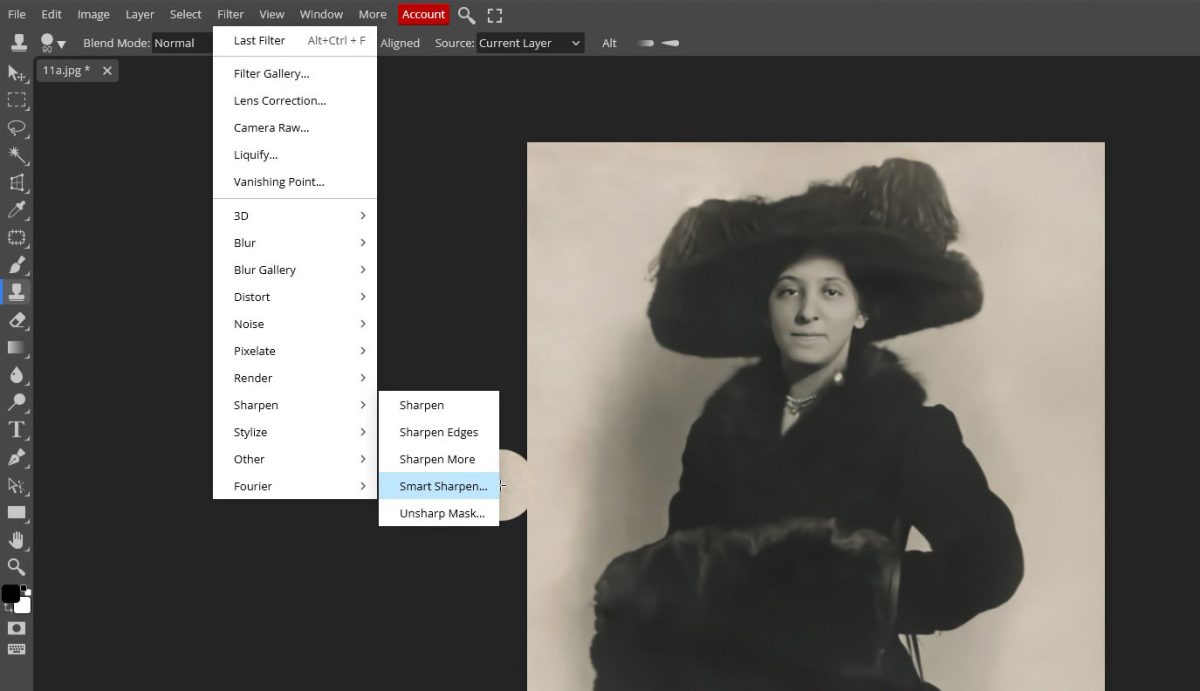
Noise reduction can sometimes soften the image, so to counteract this, we’ll apply sharpening. You can sharpen the image either through Camera Raw or by using the sharpen tools available in the filters menu. Try experimenting with these options to achieve a result that suits your preference.
4. Final Adjustments
Take a moment to review your results and make any necessary adjustments to the image. Fine-tune the settings, such as sharpening, noise reduction, or perspective correction, to ensure the final output meets your expectations. Don’t hesitate to experiment further until you’re satisfied with the overall look and quality of the image.

When to Call a Professional
While DIY photo restoration can work wonders for many photos, there are times when it’s best to leave it to the professionals. If the damage is extensive (such as deep tears, fading, or irreparable distortion), a professional photo restorer has the expertise and advanced tools to do a much better job. Additionally, if your photos hold significant sentimental or monetary value, hiring a professional might be the safest option.
Below is an example of what we can achieve. As professionals, we have the expertise to restore detail and enhance the image, transforming it into something truly impressive. Our goal is to bring out the best in your photo, ensuring it looks sharp, vibrant, and visually stunning. Let us show you how we can elevate your image to its fullest potential.
Need help restoring your photos? If your photos are too damaged for DIY restoration, or if you’d rather leave the heavy lifting to the pros, we offer professional photo restoration services. Contact us today to learn more about how we can help preserve your memories.
Experience Photo Restoration Excellence Pay Only If You're Satisfied
Allow our experts to restore your damaged photos with precision and care - satisfaction guaranteed!
You only pay if you are completely satisfied with the results.
It's Simpler Than You Think
